Six months later, we finally decided on an entertainment center for our living room. I saw a picture of the Hemnes series on Pinterest, but since Ikea was 4 hours away, I knew it would a pain to get. So, I searched every furniture store in town to try and find one I liked better. My mind kept going back to that white beauty though.
Thankfully, I have a fabulous brother-in-law who was willing to bring the boxes up for us. So, after two trips, it was mine! To keep our sanity, we put the pieces together over a course of 4 days. It was definitely a process and we were very glad when it was over.
As a reminder, here's what it looked like before. Blech! (Sorry for the crappy quality iPhone picture)
And here's what it looks like now! It looks a million times better than what we had before. It's taller, wider, and fits like a glove between our windows. For such a big living room, it's nice to have a focal point.
Now I get to do the fun part of accessorizing! I absolutely LOVE it!
Showing posts with label Decorating. Show all posts
Monday, April 7, 2014
Monday, February 24, 2014
Creating a Home Project List
We’ve been living in the house for about 6 months now and I’m embarrassed to say that I have an entire house that needs to be organized. Every single drawer, cabinet, and closet in my house is a mess. There are still a ton of boxes that need to be unpacked.
Eeek! So much stuff and no where for it to call home.
It’s time to take control of the situation, so I did what I do best, and I made a list.
My best tip is to go room by room, figure out what items you have, and what kind of organizing you need to do in each space. After your list is done, keep it somewhere you can look at it constantly, and then start tackling each space one by one.
I will share my full list with you tomorrow, but here’s an example so that you can get started on yours.
Kitchen
- Pantry
- Utensil drawers
- Small appliances
- Under the sink
Master Bathroom
- Under the sink
- Medicine cabinets
- Linen closet
Laundry Room
- Storage for laundry essentials
- Cleaning supply storage
Garage
- Storage for seasonal items
- Yard tools
- Car care supplies
Having a list breaks everything down into smaller tasks so that you can focus on one thing at a time. That will make it easier to get things done and not have to spend an entire weekend on a full room organizing product (feel free to do that if you have time though!). You’ll feel accomplished when you get an item checked off the list and you’ll have one less thing that needs organizing.
Have you made your 2014 organizing list yet? If not, get on it!
Friday, February 21, 2014
How's It Hanging?
So we've lived in this house for about 6 months now and I'm finally get some things on the wall. It definitely makes it feel more homey.
We received this piece of art as a wedding present. It looks great in our entryway.
I picked up this set of 3 mirrors from Target. Love them!
J and I made this map a few years ago to document the places we have traveled together. Love it, but sadly it's starting to bubble. Going to have to make a new one soon. This fits perfectly in the hallway across from our office.
Labels:
Decorating
Monday, June 3, 2013
Let There Be Light
The last thing that needed to be picked out for the construction of our home was the lighting. Our builder has a relationship with a local design company, so we had to make an appointment there to pick out our lights.
We had an $1850 budget for lighting and we had a lot of lights to pick out. Our main goal when we walked through the door was to not go over budget and we stayed pretty close. We ended up having to change the fan on our back porch to a light and still went over budget by $160.
Here are the lights we ended up picking out for our house. I apologize for the bad pictures!
Lights for the exterior of the garage
Front and back porch lights
Light in the front foyer
There will be two of these fans in the living room and one in each bedroom. It will be the English Bronze, which matches our dining room and kitchen lights and will have the same color glass as well.
Dining room chandelier
Main light in our kitchen
Pendant lights that will hang over our kitchen island
This light will be used in the hallway, communications room, and laundry room.
Lights that will be hanging over the master bathroom vanity
We will be using the 3 bar light in our guest bathroom. It will be brushed nickel just like the master bathroom though.
This light will be used as an overhead in both of the bathrooms as well as the overhead in the closets.
This was one of the hardest things we've done throughout this entire process, but I can't wait to see them installed in the house!
Wednesday, May 15, 2013
Colorization Choices
Before they start the build process, we had to go through the colorization process to design our house. Now this sounds like a blast, but it was hard as heck! It’s hard to imagine what all these small samples will look like when they’re actually in your house.
The first thing we had to design was the exterior of our house.
We knew that we wanted a grey house, so this was actually one of the easier processes. We chose a light gray for the main color and also for the shingles on the gable above the garage. Then, for the other gable, we chose a little bit of a darker gray. These will be accented with a dark gray stone.
We chose a craftsman style front door, which will be painted in black. Our garage door will also have some black accents, which will help tie them together. The windows on the door, house, and garage will also help tie all the pieces together.
After we finished with the exterior, we moved on to the interior, which was the hard part!
For the kitchen, we chose espresso cabinets with Giallo Ornamental A granite, which is a light tan color.
Our kitchen will have stainless steel appliances and will have a brushed nickel facuet.
For both of our bathrooms, we chose a beige tile for the floors, shower, and bathtub, which will be accented by a small strip of glass tile (the bottom one on the board). The bathrooms will have the same espresso cabinets as our kitchen and will be topped off with pearla piazza laminate countertops.
The guest bathroom will have the standard faucets that come with our package.
The master bathroom shower and tub will have the standard faucets that come with our package, but we upgraded the sink faucets.
Throughout the majority of the house, we will have sand and finish hardwood floors. In the bedrooms though, we decided on a tan carpet.
The builder only allows us to choose one color to paint the entire house (unless you pay extra), so we will be painting it Benjamin Moore’s Bleeker Beige. It’s a nice neutral color and will be easy to paint over for those rooms that I want to change.
It’s hard to picture now, but I think when the house is finished all of our choices will tie together very nicely. And I was very proud that we spent less than $1000 in upgrades, so we stayed on budget! In the end, we decided to upgrade the carpet padding to help prolong the life of the carpet, upgraded our sink faucets in the master bathroom, and also decided to add on undercabinet lighting in the kitchen.
Hopefully now that the colorization is done, they’ll be laying the foundation soon!
Wednesday, October 19, 2011
Map of Where We've Been
J and I love to travel and love to reminisce about our travels. We both did some traveling separately before we met and we've done even more since we've been together.
I really wanted to find a way to document all our travels in one place that we could easily look at. One day when browsing Amazon, I came across this cool vintage map.
I paid a total of $6 for it including shipping. It's currently even cheaper than that.
I decided I wanted to frame the map and then put map pins on it to document everywhere we have traveled.
I bought a huge foam board, cut it down to size, and then dry matted the map with some permanent scrapbooking tape. Looking back, this was not the best way to do it because the map is starting to bubble. I know Hobby Lobby will dry mat the poster to the foam board for you, but not sure about the cost.
I found the frame at Hobby Lobby on sale for 50% off. I paid a total of $24 for it. It was an open stock frame, so it didn't come with glass, a backing, or any hangers. If you buy a frame at Hobby Lobby, they will insert the picture for you for free and also attach hangers for $1. Great deal!
So, all we did was actually attach the map to the foam board and then Hobby Lobby did the rest.
Here's the finished project:
The green map pins are J's, the yellow map pins are mine, and the red map pins are for the places we've traveled together (J chose red because he said it stands for love. Aww!)
In the end, it was a relatively inexpensive project and I love the way it turned out.
Here's the cost breakdown:
Map: $6
Frame: $24
Foam board: $4
Map pins: $2
Hanger: $1
Total: $37
Labels:
Decorating,
DIY
Wednesday, July 6, 2011
Bedroom Furniture
We finally made a decision on our new bedroom furniture!
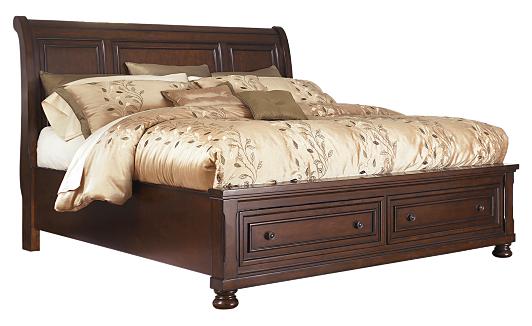
We were debating between this set from Havertys:
Or this set from Ashleys:
We deliberated for a good while about what we wanted and finally made our decision 30 minutes before the store closed yesterday!
We ended up with.... *drumroll*
....
....
...
...
...
....
The set from Ashleys!
Even though we've been eyeing the Havertys set for months now, we decided that we wanted to go with something more traditional. I came across the Ashleys set and loved it!
Here are the individual pieces in the set.
I think I'll be very happy with our set for years to come.
I'm so glad we're done with that. Furniture shopping was a lot harder than I thought it was going to be!
Labels:
Decorating
Monday, June 27, 2011
Dining Furniture
My grandparents visited over the weekend and we went out looking for furniture. While we were out, I stumbled a table that I'm in love with.
The table is from Pier 1. The table comes in the brown that's in the picture as well as black and white. I'm leaning towards the black (sadly they don't have a picture of it online). The brown is gorgeous, but I hate the chairs that coordinate with and I think it would be too hard to find chairs to match the color of it.
The table is extendable, so I can keep it as a circle or a oval, whichever I need at the time. I will most likely keep it in a circle most of the time because our current dining room isn't that large.
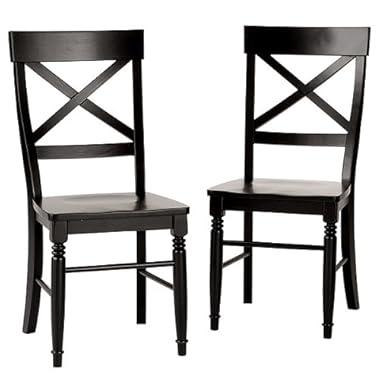
Since I hate the chairs that coordinate with the table, I had to go on the hunt for different chairs. I came across this pretty ones at Target. I think they match nicely.
I like how the little detailing on the chair legs match up with the pedestal on the table.
Looks like a perfect match to me! What do you think?
Labels:
Decorating
Monday, June 20, 2011
Apartment Pictures
We went this weekend to sign our lease for our new apartment. So, we officially have an apartment and are moving the weekend of July 29th!
While we were there, we also went into an apartment and took some pictures and measurements.
This is from inside the apartment, looking at the front door.
There's a little nook to the side of the front door. I'm planning on putting an end table and some shelves with hooks there to corral our stuff as we walk in the door.
This picture is taken from the dining room, looking into the kitchen.
This is the other side of the kitchen. The bar looks into the living room with the dining room to the right.
The dining room and kitchen, taken from the living room. Our master suite is through the door on the left.
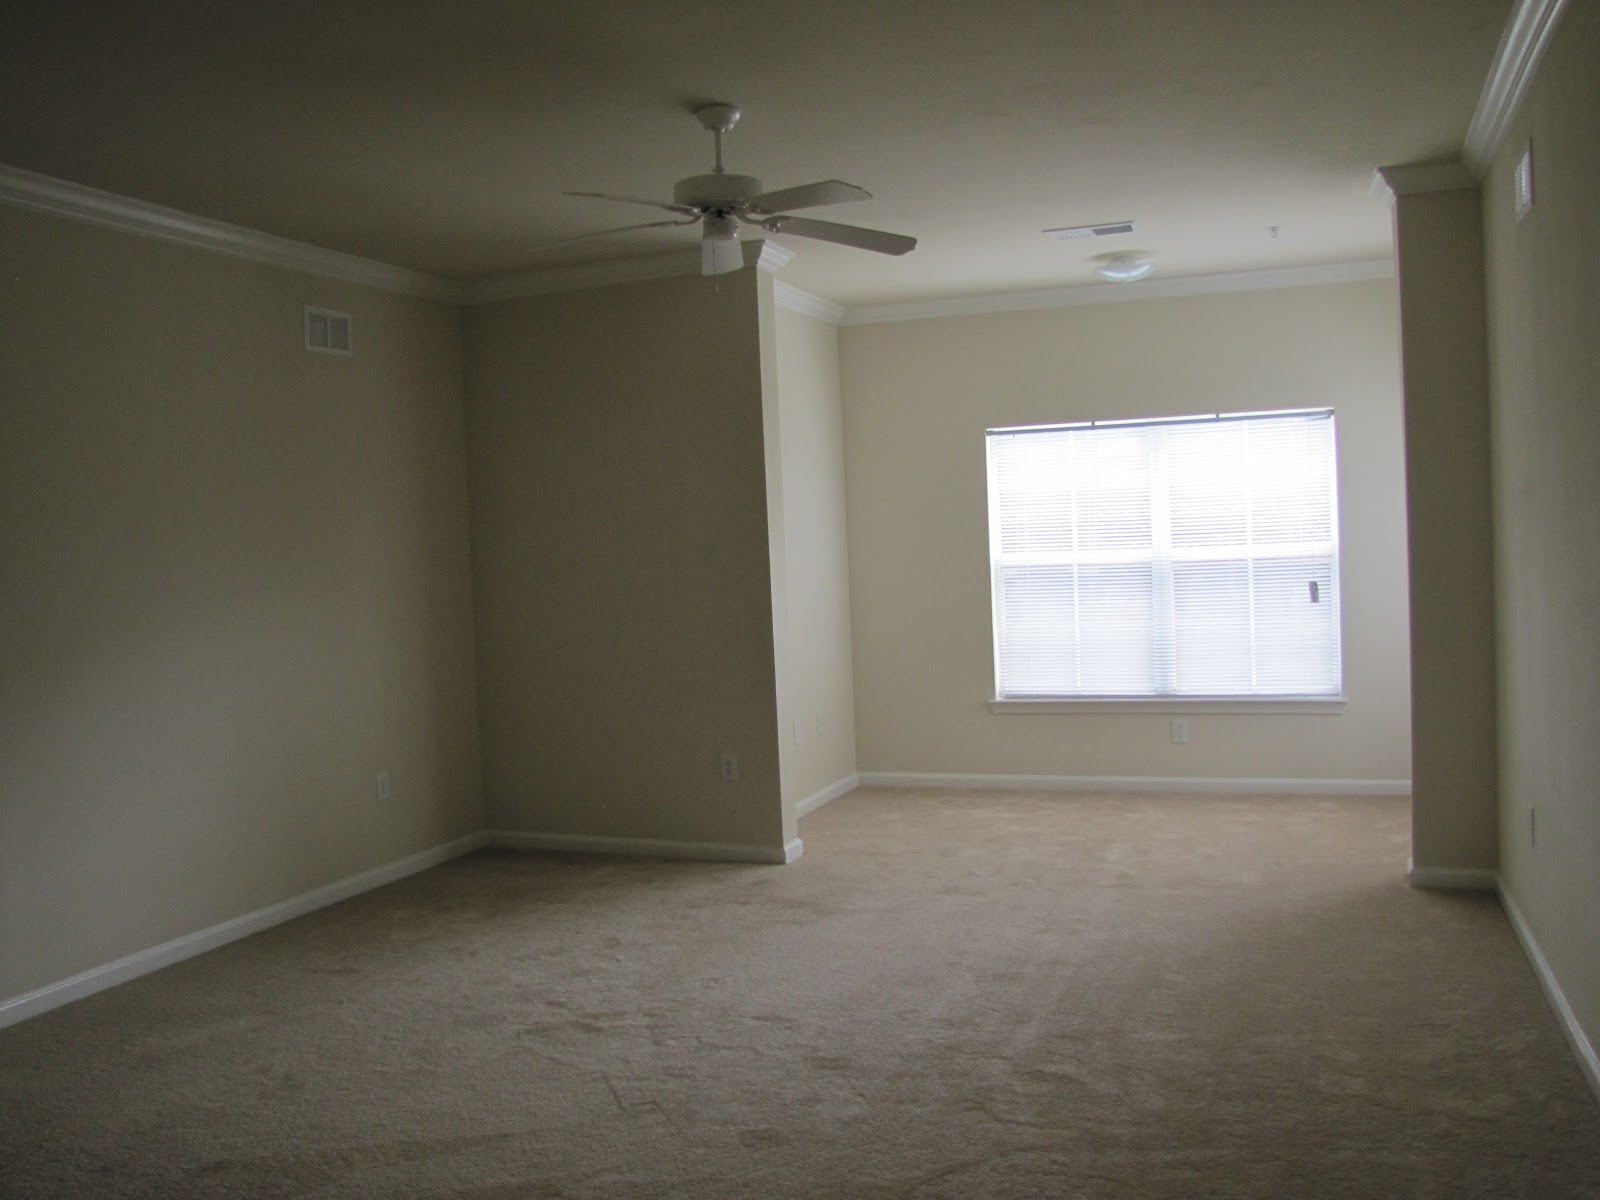
Living room taken from the dining room. In our apartment, there will be a fireplace in the corner on the left of the picture. We also have vaulted ceilings in ours.
A picture of the windows in the sunroom part of the living room.
Master bedroom taken from the doorway. The one downfall to the apartment is the master bedroom is kind of small.
It has a walk-in closet though! With more shelving in the left of the closet that you can't see in the picture.
Nice size master bath too, with a huge tub!
Horrible picture of the guest bedroom. We're going to be using this as an office.
Last but not least, the guest bathroom.
Oh, and just because I'm a dork, I'm in love with the refrigerator and freezer. There is so much storage potential!
I'm in love and can't wait to start decorating!
Labels:
Apartment,
Decorating,
Moving
Subscribe to:
Posts (Atom)